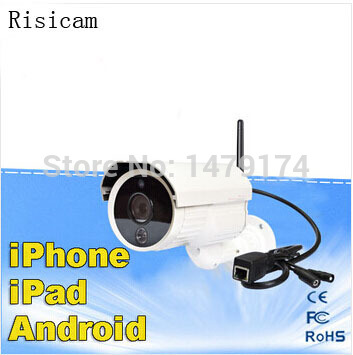


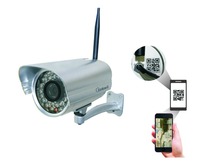
Risin FW919Waterproof Wireless High Definition Wifi Webcam Outdoor P2P HD IP Camera
| 45 days Money back Returns accepted if product not as described, buyer pays return shipping; or keep the product & agree refund with seller. | |
|
On-time Delivery Guarantees: On-time Delivery 60 days |
Most Popular from Category
Risicam Waterproof Wireless High Definition Wifi Webcam Outdoor P2P HD IP Camera
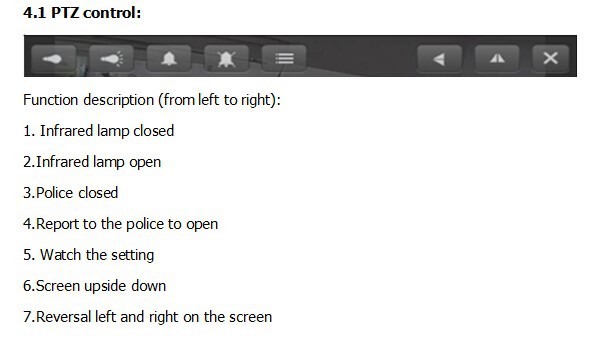
Features:
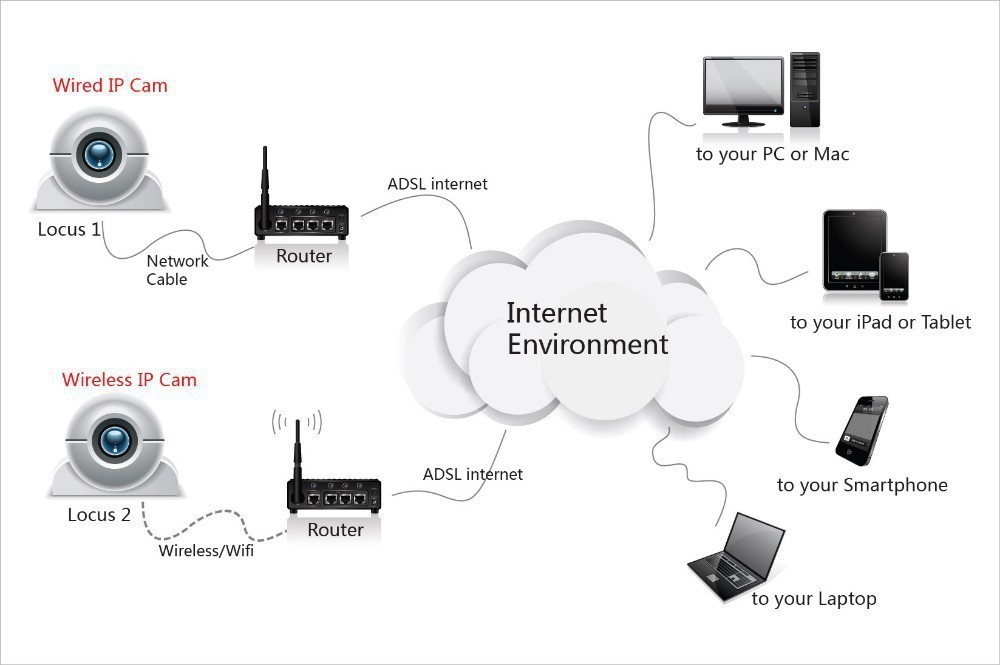
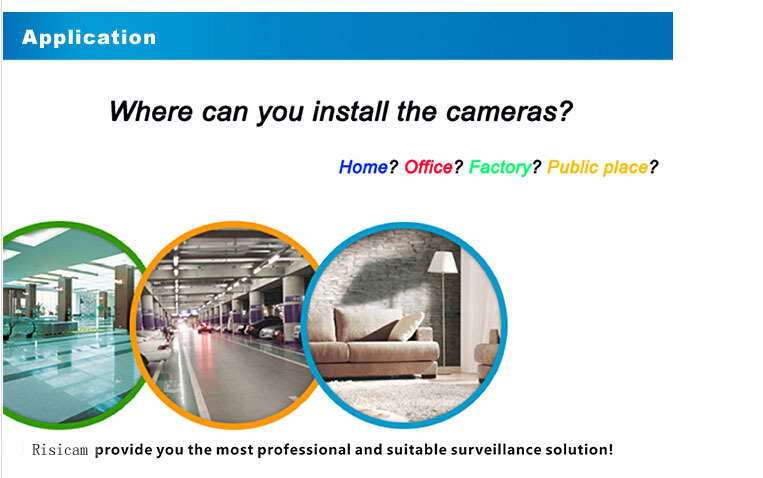
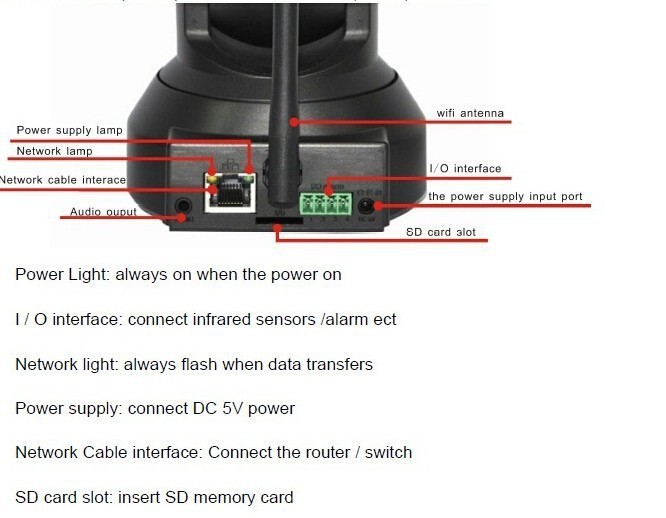
1.Wireless wired dome indoor outdoor waterproof IP network camera
2.P2P peer to peer camera
3.iPhone,ipad,android smart phone,pc surveillance
4.Easy login by ID,Password
5.Cloud computing technology
6.Multi client access
7.IR for Day and night monitoring
8.High speed h.264,MPEG-4,M-JPEG
9.Motion Detection
10.All in one network camera
11.Two way Audio,Microphone,loudspeaker
12.3GPP Mobile surveillance
13.Onvif support
     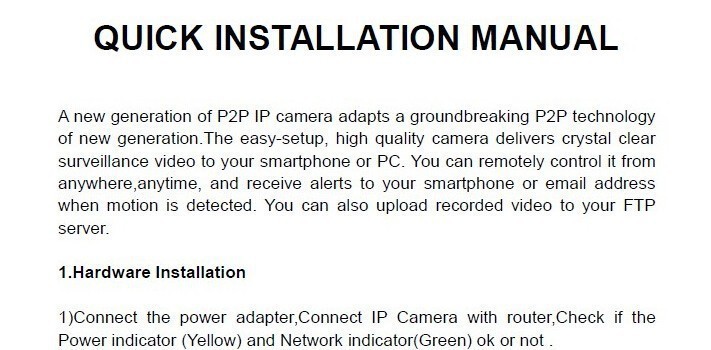  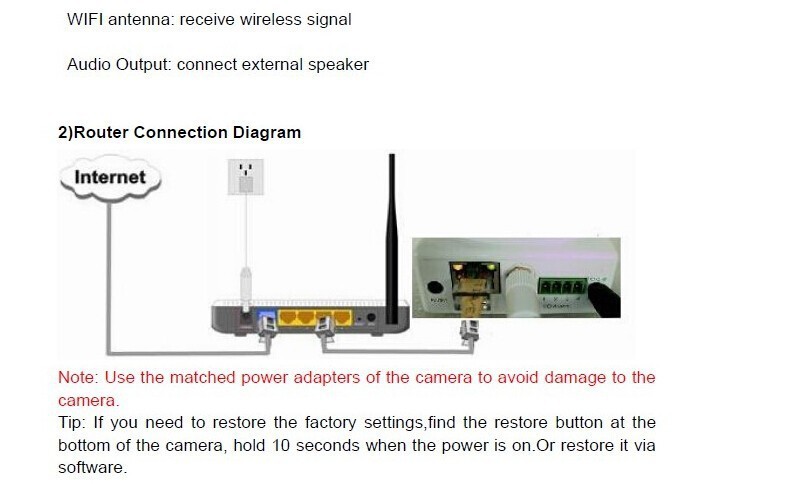
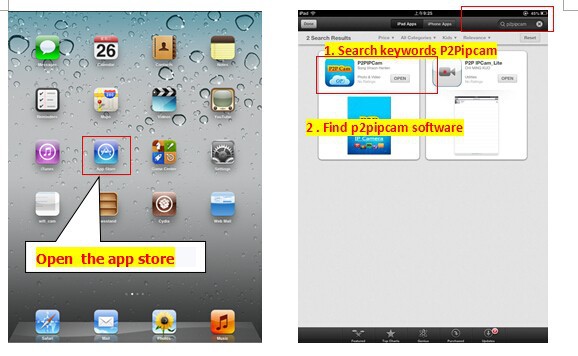
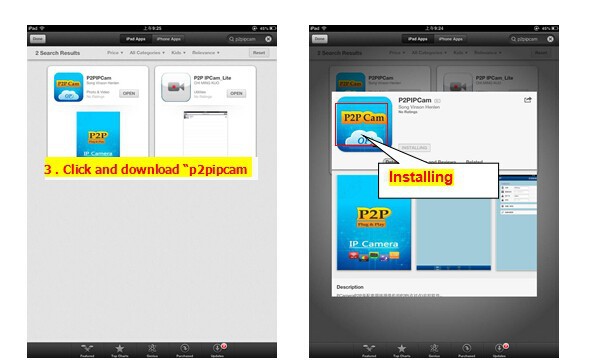
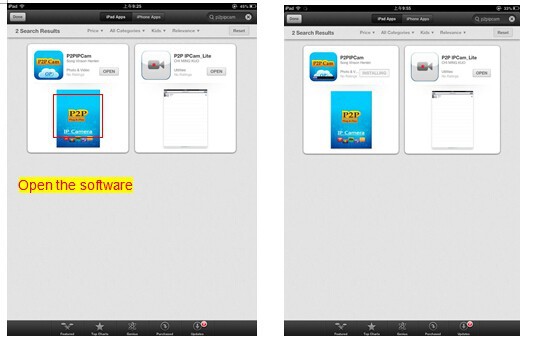
Note : Make sure that the phone is able to connect to the Internet before use the IPHONE,IPAD APP. Download way. To search and install the “p2pipcam” in the app store. Pls check as below.
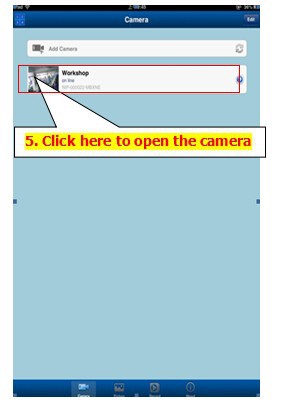
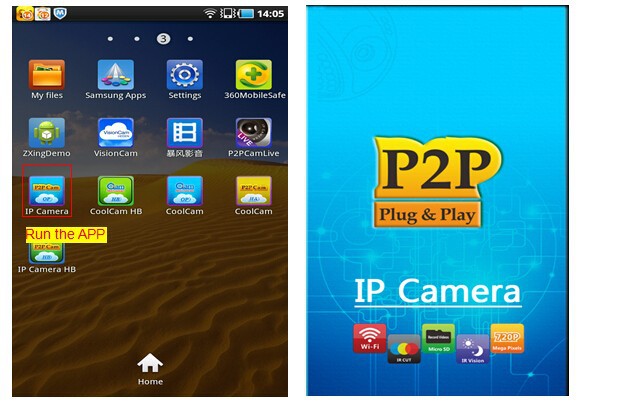
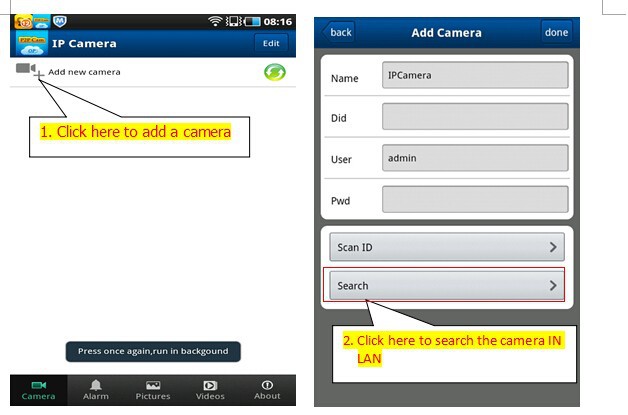
1. Initial interface In the main memu of the phone, find the APP and run.
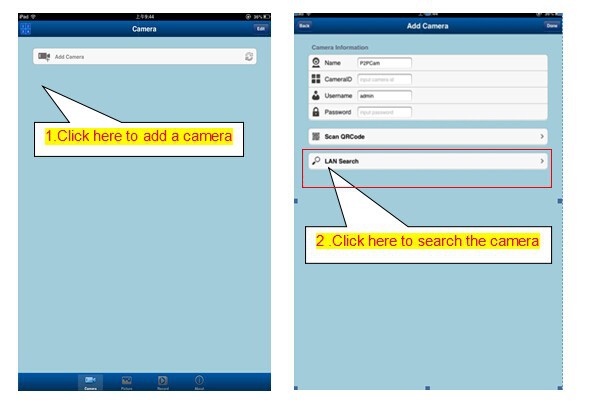
2. Add Device There are some steps to finish the installation.
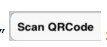
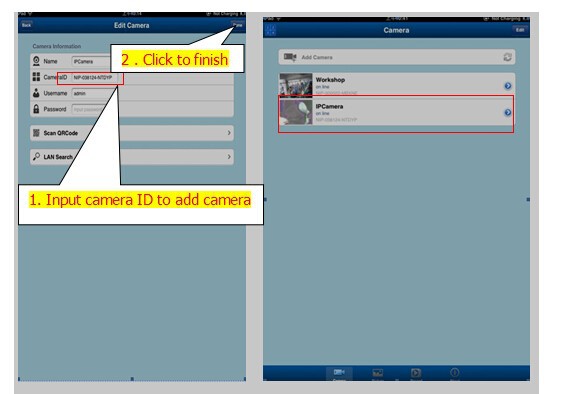
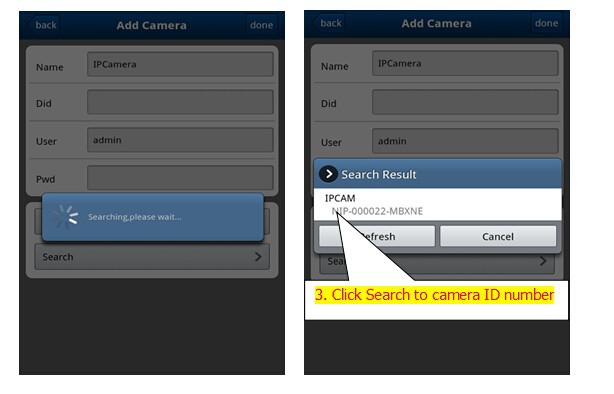
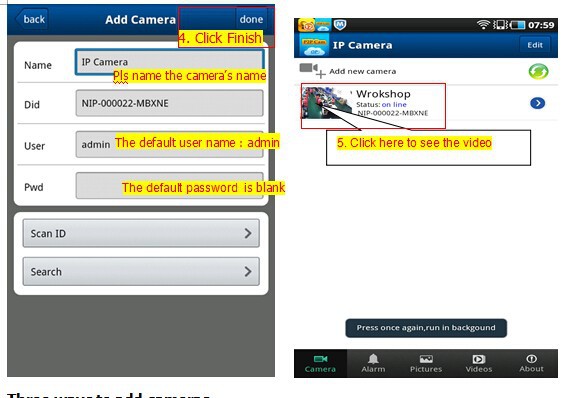
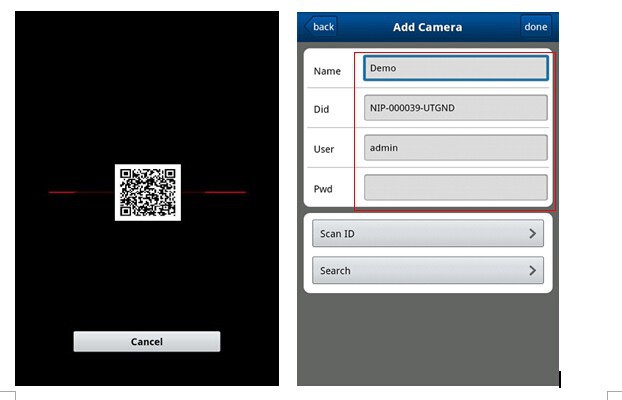
There ways to add cameras: One: Click Search LAN, user can search and add cameras in one LAN,if the cameras and phones are not in one LAN,then cameras won’t be searched. Way 2:Click ” Scan QRCode” Scan the QR Code on the housing of IP camera. Way 3 : Input the UID on the “Device ID” of the APP. The default username is: admin.No password.Note:the “Device ID”is on the bottom of the ip cameras.
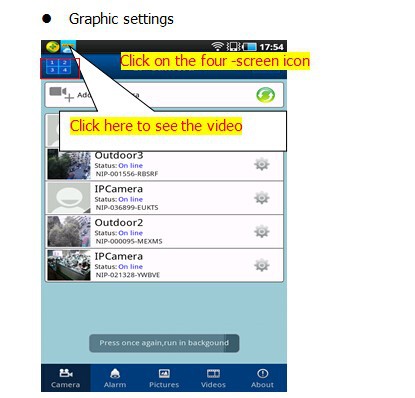
l Graphic setting
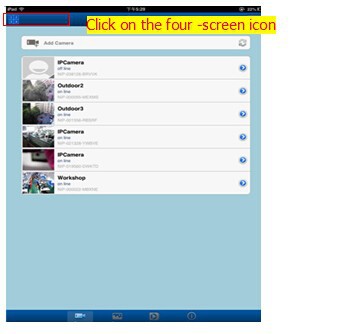
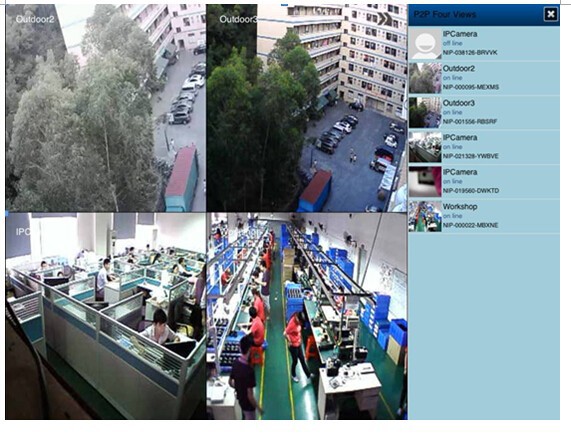
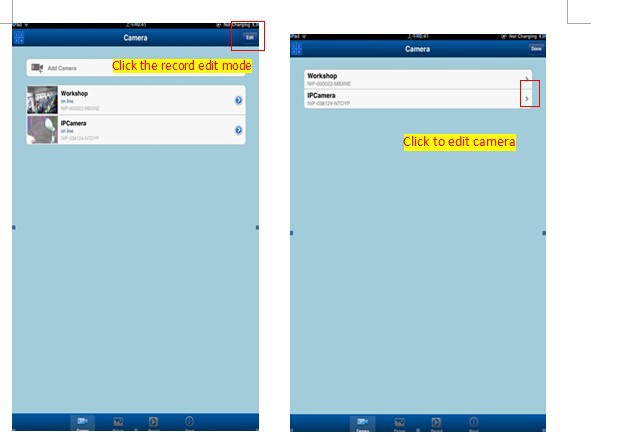
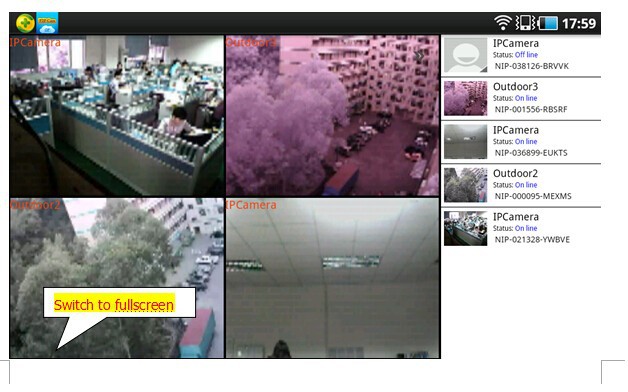
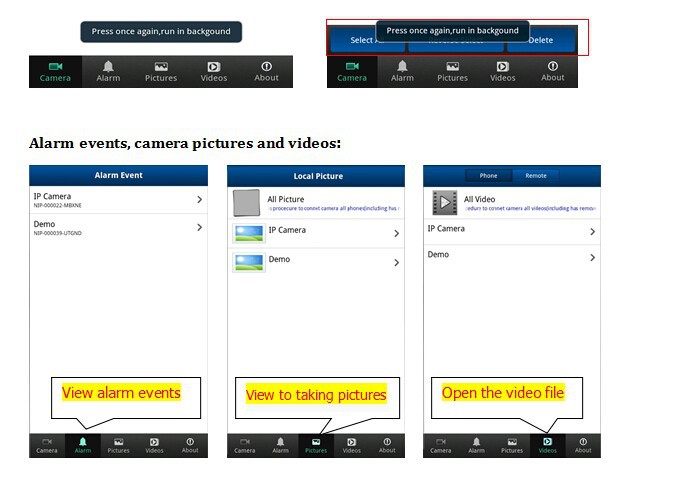
Four graphic settings, click on the list to the right of the camera
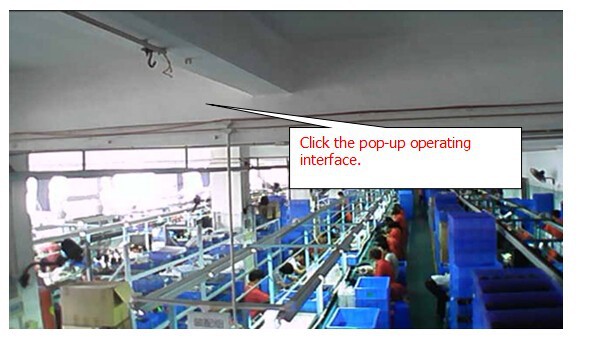
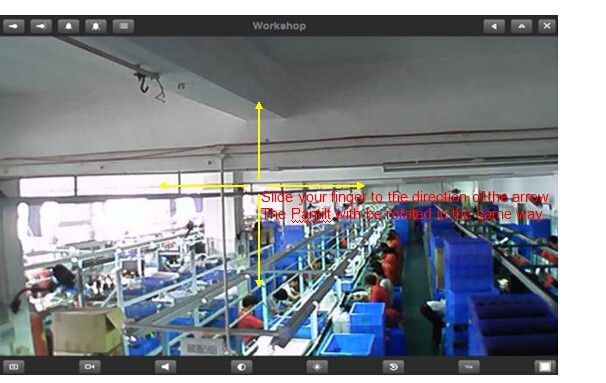
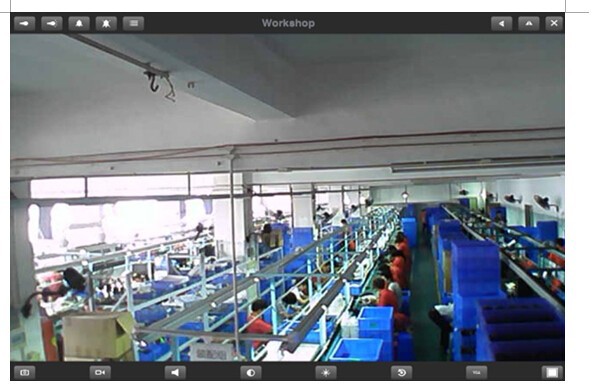
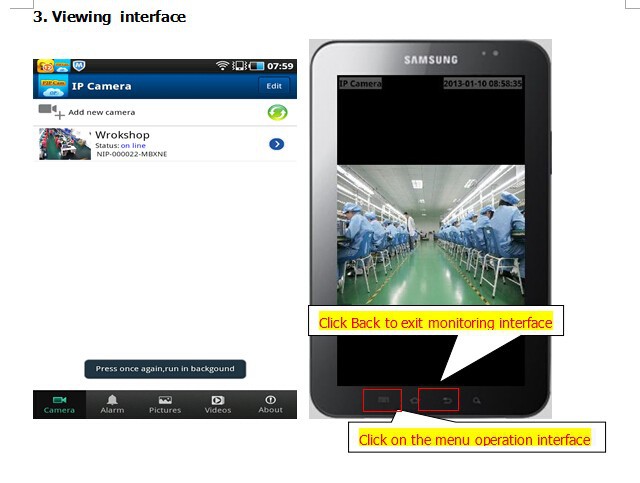
3.View interface
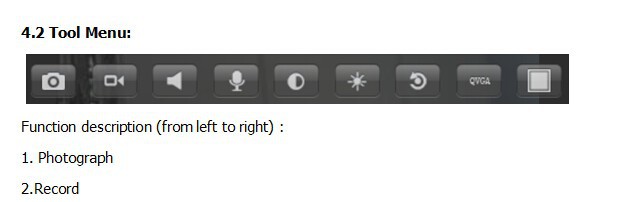
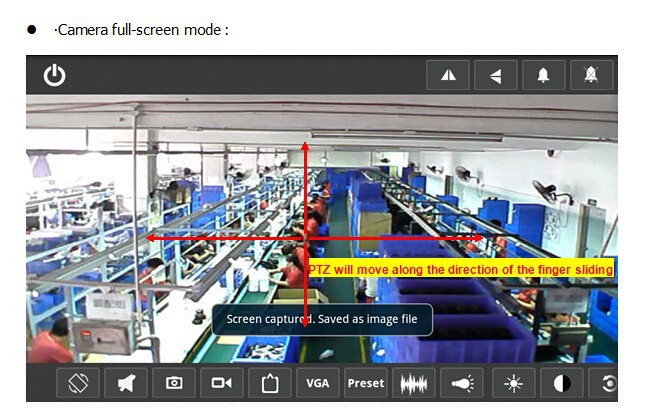
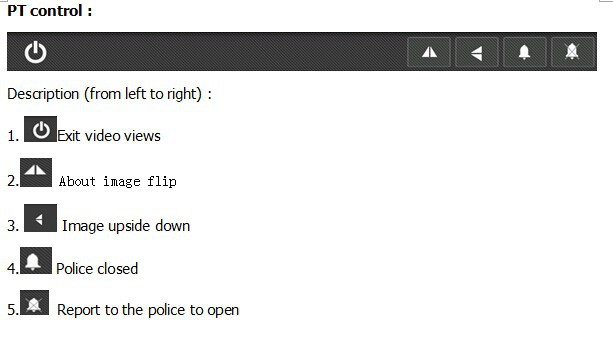
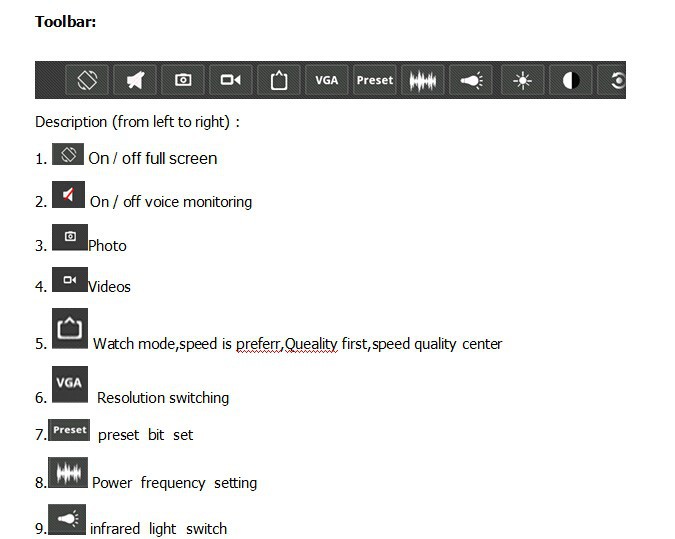
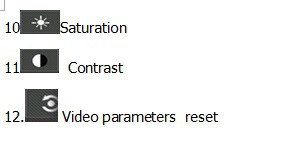
3. Audio / mute 4. Talkback 5. Contrast adjustment 6. Brightness adjustment 7. Video parameters to restore the default values 8. Resolution adjustment (When the mobile or IP camera in poor network, it can adjust resolution and reduce the quatity.) 9. Full screen display / returns
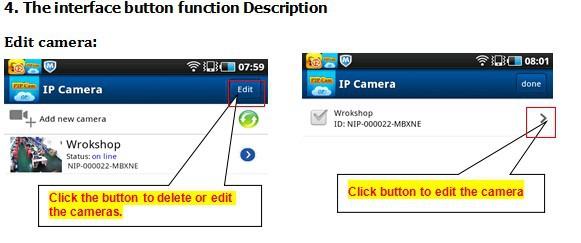
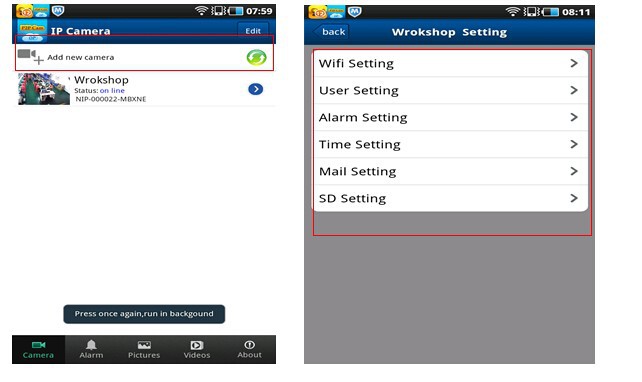
Parameter settings: Enter edit mode to modify parameters or delete the camera. As following :
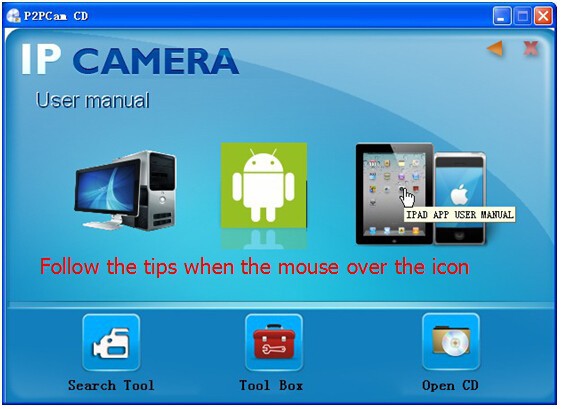
Manual for P2P IP CAMERA Android APP
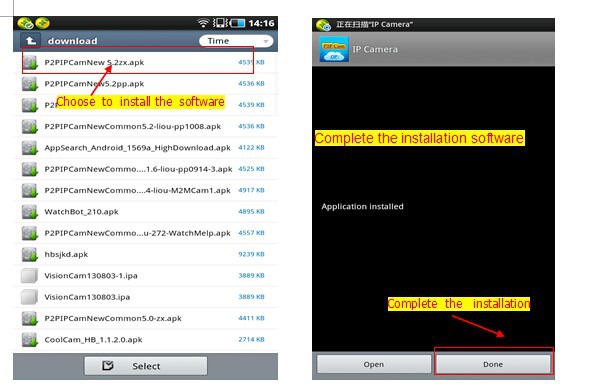
Note : Make sure that the phone is able to connect to the Internet before use the Android APP.. • Download ways: l Find the “P2PIPCamNew 5.2zx.apk”file in the CD.Install it at Android mobile phones.Pls be patient until the Android APP installed and displayed on the screen. l 1. Initial interface
1. Add cameras How to add cameras,pls check as below.
Three ways to add cameras. One: Click Search LAN, user can search and add cameras in one LAN,if the cameras and phones are not in one LAN,then cameras won’t be searched. Two: Click ” Scan ID” Scan the QR Code on the housing of IP camera.
Three: Input the UID on the “Device ID” of the Android APP. The default username is: admin.No password.Note:the “Device ID”is on the bottom of the ip cameras.
(In the mobile network or the network used by the camera , the poor circumstances , can adjust the resolution and to reduce the number of contracting )
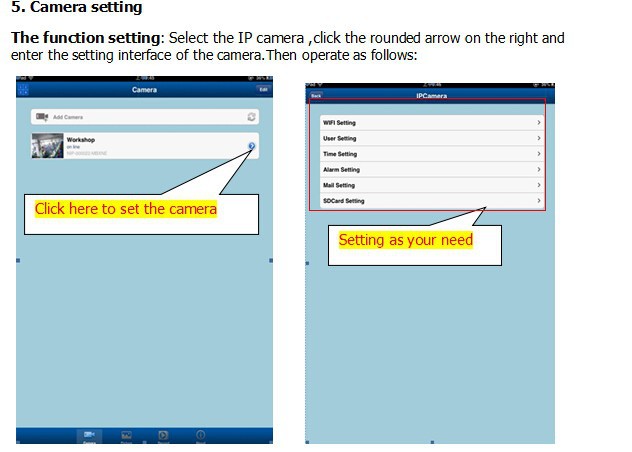
5. Camera settings The circular arrows corresponding to the right of the selected equipment Click equipment , to enter the camera settings interface , as shown below:
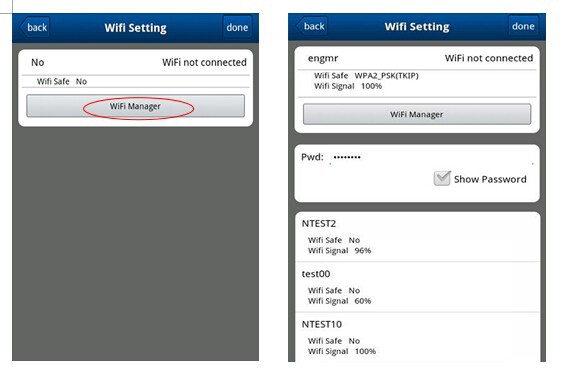
5.1 .WIFI Setting : click WIFI settings enter WIFI setting interface , the search near WIFI hotspot , choose a wireless router to enter the password , click OK , reboot your machine connected to WIFI , as shown below
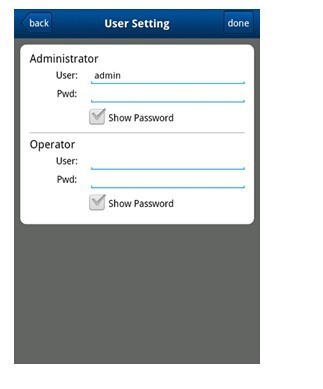
5.2 . User Settings Can set user name and password of the administrator and operator
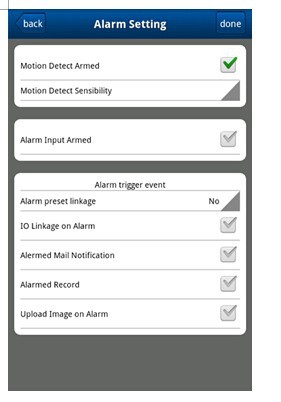
5.3 . Alarm settings: You can set the alarm parameters
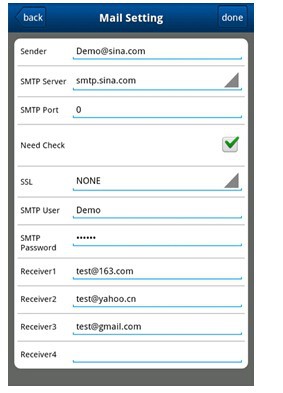
5.4 Mail Settings: You must fill in the correct sender and receiver mailbox and mail server parameters
|
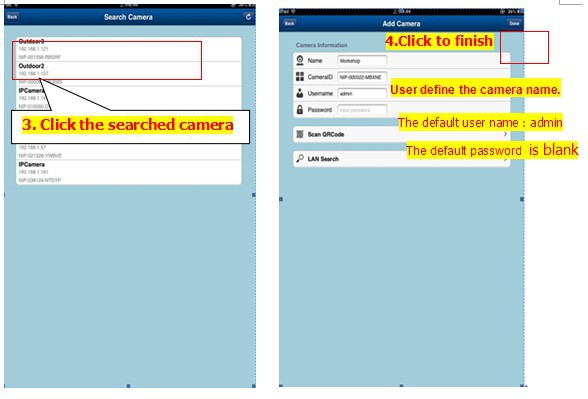
 It will find and add the ID automatically,Then click to finish.


0 out of 5 (0 Ratings)
| Positive (0%) |
5 Stars (0)
|
|
4 Stars (0)
|
|
| Neutral (0%) |
3 Stars (0)
|
| Neutral (0%) |
2 Stars (0)
|
|
1 Star (0)
|
| Name | Rating | Feedback |
|---|
| Shipping Company | Shipping Cost | Estimated Delivery Time |
|---|---|---|
| 3 - 7 days | ||
| 3 - 7 days | ||
| 5 - 14 days | ||
| Post Air Mail | Free Shipping | 15 - 45 days |
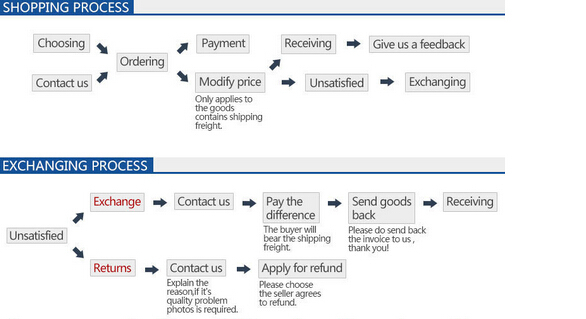
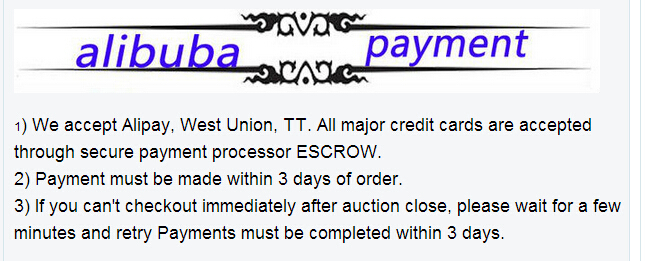
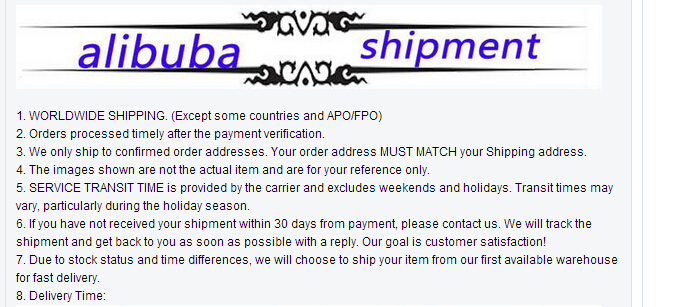
| Return Policy | If the product you receive is not as described or low quality, the seller promises that you may return it before order completion (when you click "Confirm Order Received" or exceed confirmation timeframe) and receive a full refund. The return shipping fee will be paid by you. Or, you can choose to keep the product and agree the refund amount directly with the seller. N.B.: If the seller provides the "Longer Protection" service on this product, you may ask for refund up to 15 days after order completion. |
|---|---|
| Seller Service | On-time DeliveryIf you do not receive your purchase within 60 days, you can ask for a full refund before order completion (when you click "Confirm Order Received" or exceed confirmation timeframe). |

Most Popular from Category
INNVO Wireless IP Pan Tilt Zoom Camera with complete setup using smartphone – Simple yet Advanced IP solution FREE SHIPPING
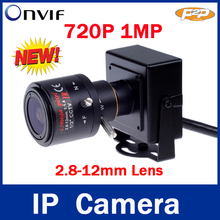
1280 * 720P 1.0MP mini IP Camera ONVIF 2.0 2.8-12mm manual varifocal zoom lens P2P Plug and Play With bracket
US $25.69 / piece
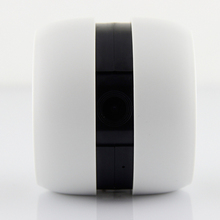
Portable WIFI Mini Camera Support for iPhone iPad and Adroid Tablet and SmartPhone
IP Camera 1280*720P 1.0MP Bullet 24pcs IR Cut Megapixel Lens Outdoor Security ONVIF Waterproof Night Vision P2P IP Cam
US $25.66 / piece
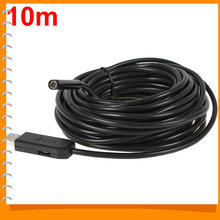
Waterproof 10m Mini USB Endoscope Inspection Wire Camera 7mm Lens 6 White LEDs Video Snake Tube Camera Borescope Endoscope

Infrared IR 36 Led Illuminator Board Plate for CCTV CCD Security Camera
US $1.90 / piece
online shopping, buying directly from manufacturers?
- Go to Alibaba.com and enter the wanted item into search field.
- Having made your choice, click "Contact supplier" button on the right
- On the next page enter your request and click "Send" button.
- Upon clicking you will be asked to get registered. Do it and wait for the reply.
 ▼
▼