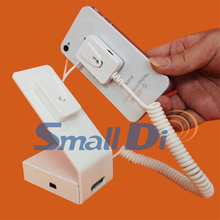
Multiple phone alarm for Sumsang, micro interface,phone anti-theft alarm Mobile security bracket Security alarm
| 45 days Money back Returns accepted if product not as described, buyer pays return shipping; or keep the product & agree refund with seller. | |
|
On-time Delivery Guarantees: On-time Delivery 60 days |
Most Popular from Category
This product is only suitable for the Android phone.
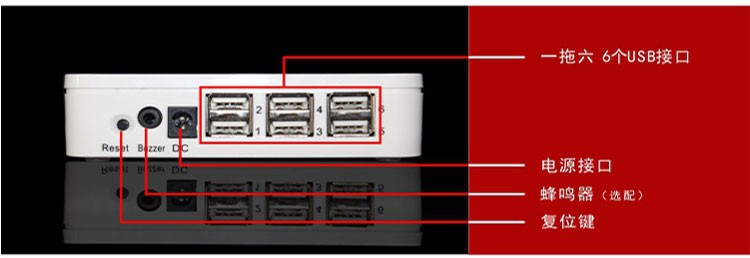
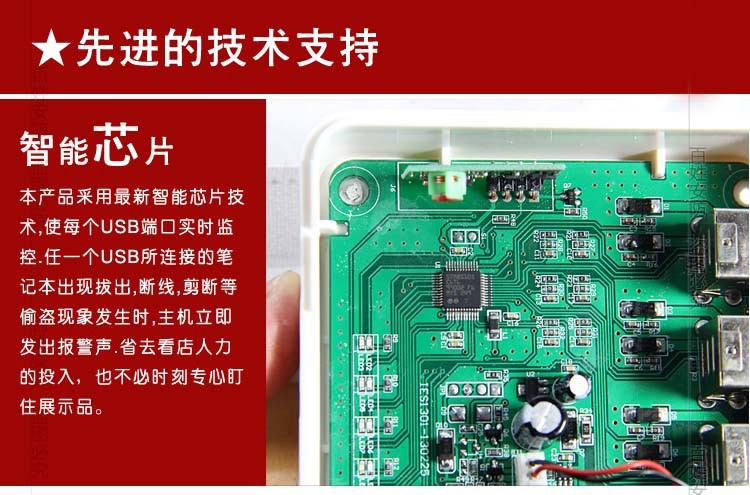
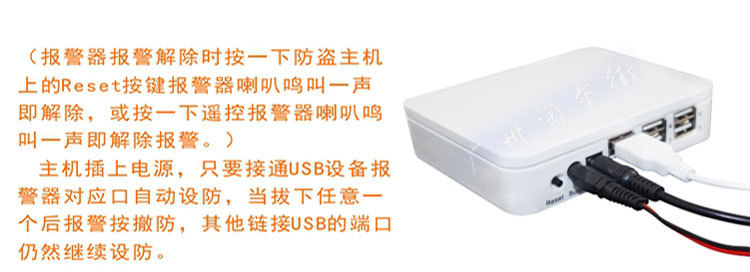
The host introduced: this product is to use the latest version of security system and the newest electronic system design, and as long as you purchased this item,if you don’t have security line, connected to the original charge line can achieve security and charging, such as you take mobile phone original charging line connection to the burglar alarm host and another head mobile phones, can realize charging and guard against theft. Simple and practical.
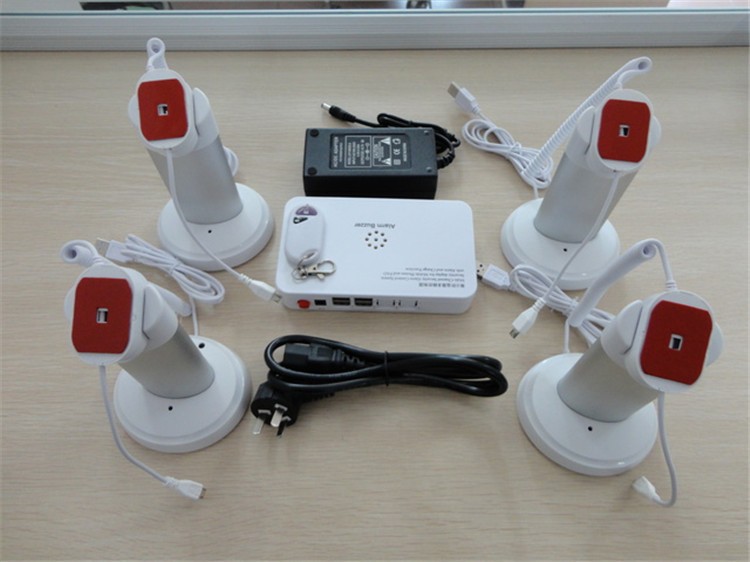

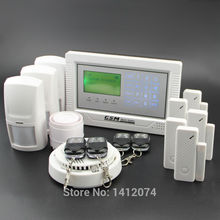
Instruction Manual of Multi-Channel Display Alarm System
Instruction Manual of Multi-Channel Display Alarm System
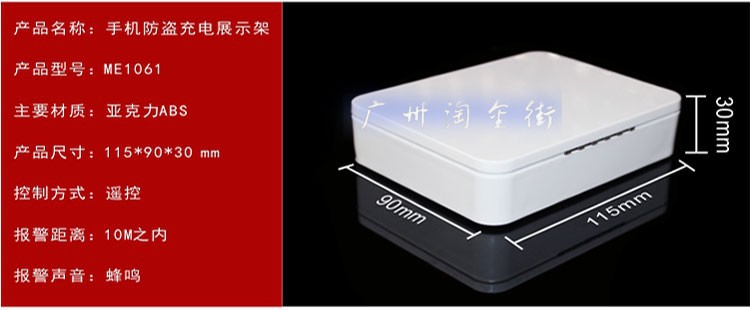
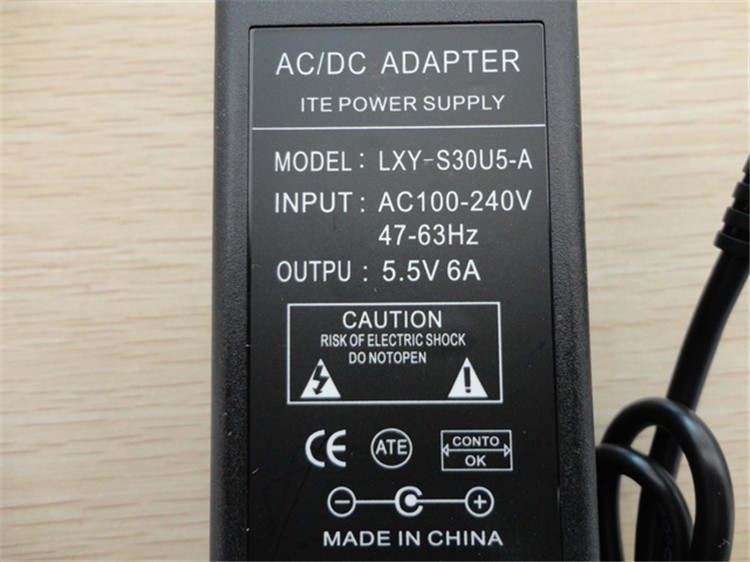
AC INPUT:100~240VAC,50/60Hz
DC INPUT:5~6VDC,1A~10A
OUTPUT: 5~5.5VDC 1~2A/CHANNEL
INPUT CONNECTOR TYPE: DC5521
OUTPUT CONNECTOR TYPE: STANDARD USB CONNECTOR
CHARGING MODE: AUTOMATIC RECOGNITION AND SELF-CHARGING
ALARM VOLUME: >110 dB
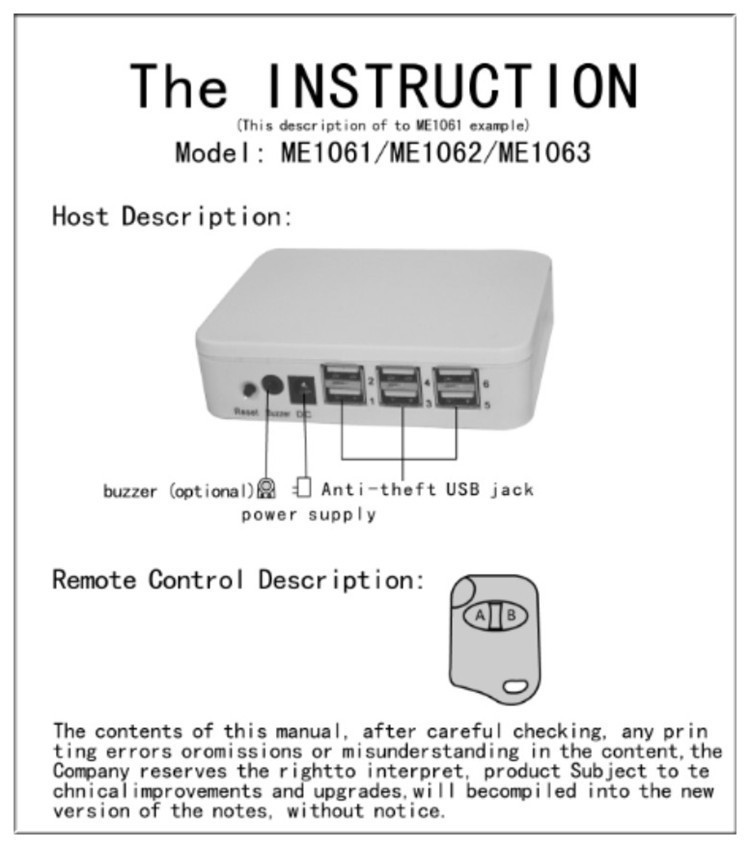
RESET: REMOTE CONROL/AUTO/MANNUAL
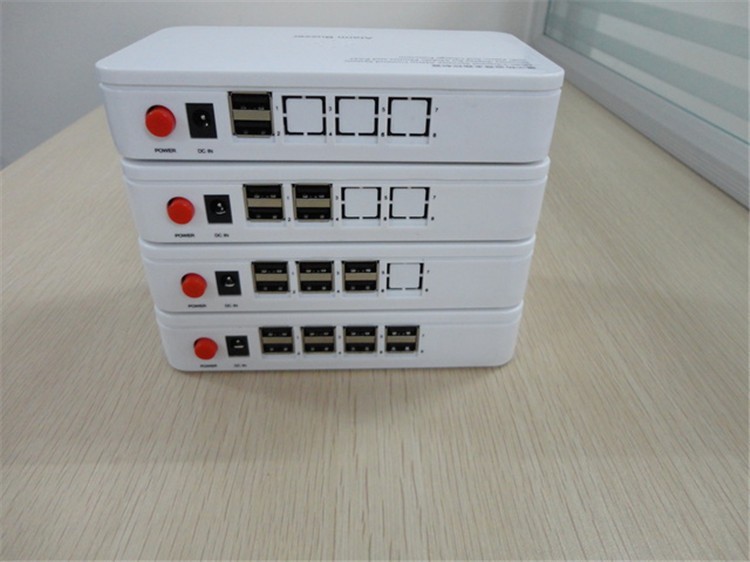
CABLE LENGTH BETWEEN THE CONROLLER AND THE DISPLAY HOLDER: 1.2~1.6METERS
1. Alarm Mode
Alarm mode for USB Charging, Alarm
Alarm based on Charging Connector; Alarm based on Earphone Connector; Alar based on Tactile Switch;
Alarm based on Notebook PCB USB Connector. Alarm based on Cord
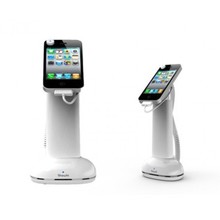
It alarms when the displayed device is removed from charger cable, when the charger cable is cut off, when the charger cable is removed from Display Alarm.
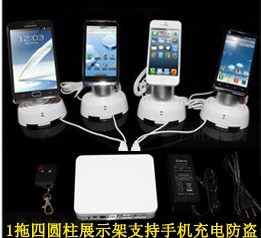
Application: this device is used for the displaying, charging of the electronic products like: mobile phone, iPad, PDA, Notebook PC, GPS Navigator, Digital Camera, Mobile Power Pack, Digital Photo Frame, Digital Amplifiers and so on.
How to operate it.
1.The display alarm has 3 different models: Learning Model, General Model, Auto-Reset Model.
The Learning Model and the General Model, have a remote control and lithium battery inside the device, while Auto-Reset Model doesn’t have a remote control and lithium battery
The Learning Model has to be taught before the remote can controls the display alarm. One remote can control different display alarms. Different remote controls can control the same display alarm. The General Model, its remote is for general purpose, that means the remote can control the different display alarms in the same batch. The Auto-Reset Model, is provided with a RESET switch in the display alarm, it stops alarm automatically after it alarms 20 seconds or when the detector is attached the mobile phone or notebook PC. It stops alarm when pressing the RESET switch.
2.How to teach the Learning Model display alarm: Power the display alarm, all the LED indicators are lighted RED, buzzer” Beep Beep Beep” as an indication. Press any button on the remote, you will hear one long time “Beep”, all the LED indicators are OFF. That means it has been taught successfully. The time interval for teaching and learning is 5 seconds after power ON. If you don’t finish the teaching in time, you can remove the power and power the device again. After the display alarm is taught, press any button on the remote, the display alarm will respond. After teaching, the remote is the only device which controls the display alarm.
3.The Learning Model and the General Model have lithium battery inside the device. When the device is connected to the power adaptor, Press the Red Button, otherwise, the battery will not work.
4.Use the power adaptor to power the Display Alarm, press the Power Switch, it will alarm. Press
Remote or press the Reset Switch to stop the alarm.
5.Connect the displayed devices like mobile phone, notebook PC, to the Display Alarm using charger cables, make sure it is well plugged and well connected. If you like to charge those displayed devices, be sure to power the Display Alarm using power adaptor.
6.Connect the charger cable to the USB connectors or connectors (for purpose of data communication and charging) of displayed devices. Pls attach the tactile switch or the cord loop to the displayed devices. When it is well connected, The LED indicator will light up. If LED is lighted with one color, it means there is one alarm mean which has been successfully set up. If LED is lighted with 2 different colors( color switches very 2~3 seconds), it means 2 alarm means have been successfully set up.
7.Remove the charging cable, cut off the charging cable, it will alarm. Use remote control to stop the alarming.
8.When the display alarm alarms, press any button on the remote control for 1~2 seconds, it will stop alarming. After stopping the alarm, the system will be armed again. When there is no alarming, press any key on the remote control, the display device will sound accordingly.
Packing Details
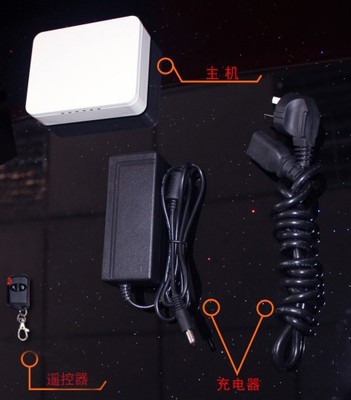
Display Alarm 1 unit
Power Adaptor 1 unit
Connection cables qty is according to client’s needs
Instruction Manual 1 pcs
Remote Control (optional)
Connection Cables for IPHONE(optional)
Note: Connect the cables to the mobile phones or the Ipad charging connectors. You can choose different display stands and connection cables.
Tips for using adhesives: the surface where the adhesives are applied, should be clean. Temperature over 20°C. If the temperature is too low, pls use a hotwind gun to heat the surface. Make sure the operator’s hands are clean. Usually, it takes 1 hour to achieve 60% of its ideal adhesive performance, 24 hours to achieve 90% of its ideal adhesive performance, 72 hours to achieve its full adhesive performance. If the local temperature is too low, it takes longer time. To guarantee it is strong enough, DON’T move or pluss the adhesives in 24 hours.

0 out of 5 (0 Ratings)
| Positive (0%) |
5 Stars (0)
|
|
4 Stars (0)
|
|
| Neutral (0%) |
3 Stars (0)
|
| Neutral (0%) |
2 Stars (0)
|
|
1 Star (0)
|
| Name | Rating | Feedback |
|---|
| Shipping Company | Shipping Cost | Estimated Delivery Time |
|---|---|---|
| 3 - 7 days | ||
| 3 - 7 days | ||
| 5 - 14 days | ||
| Post Air Mail | Free Shipping | 15 - 45 days |
| Return Policy | If the product you receive is not as described or low quality, the seller promises that you may return it before order completion (when you click "Confirm Order Received" or exceed confirmation timeframe) and receive a full refund. The return shipping fee will be paid by you. Or, you can choose to keep the product and agree the refund amount directly with the seller. N.B.: If the seller provides the "Longer Protection" service on this product, you may ask for refund up to 15 days after order completion. |
|---|---|
| Seller Service | On-time DeliveryIf you do not receive your purchase within 60 days, you can ask for a full refund before order completion (when you click "Confirm Order Received" or exceed confirmation timeframe). |

Most Popular from Category
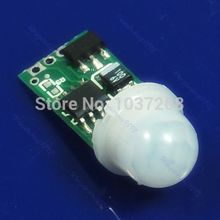
HOT SALE FLASHING BEEPING REMOTE LOST KEYFINDER LOCATOR KEYRING # ZH176
US $1.55 / piece
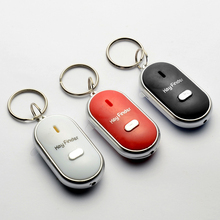
Free Shipping Q105dB Wireless IR Infrared Remote Security Alarm System Motion Detector Alarm Sensor Good Quality
US $13.33 / piece
1
US $150.00 / piece
Cell Phone Security Display Alarm, double protection , with charger/ Alarm/ aluminium alloy stand/ Free shipping
Cell mobile Phone Security Display Alarm stand holder shelf, with chargering stand
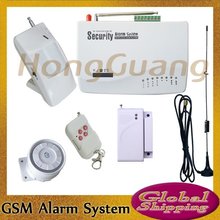
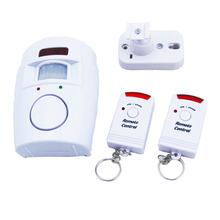
New Wireless GSM Home Office House Security Burglar Alarm System Auto Dialing Dialer SMS Call 1111
online shopping, buying directly from manufacturers?
- Go to Alibaba.com and enter the wanted item into search field.
- Having made your choice, click "Contact supplier" button on the right
- On the next page enter your request and click "Send" button.
- Upon clicking you will be asked to get registered. Do it and wait for the reply.
 ▼
▼